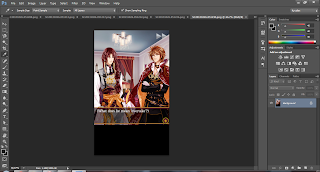
Menu Bar -> File -> Automate -> Batch
For those who haven't know, that feature allowed us to do repeatable actions simultaneously.
In my case, I used that to trim every Solmare's games screencaps.
What is trimming?
Trimming is a way to remove a large area of the same and homogeneous color, usually on the edges of a picture.
 A sample of un-trimmed picture, you can see that there's a black area on the bottom edge of the pic that I want to trim.
The problem is, if I kept trimming manually, my fingers eventually will become numb. I should get a solution as fast as possible before they're getting numb.
And when I was googling for a solution, I found an article about Automate Batch feature...
How to use the feature?
- You should enable the Actions tab on Photoshop.
Here's how: Menu Bar -> Window -> Actions (Alt +F9) - You will see something like this

See the Icons on the bottom:
- square : stop playing / recording
- circle : begin recording
- play : play selection
- folder : create new set
- new : create new action
- trash bin : delete
- Choose New -> Record (the circle icon) -> and trim your picture as usual.
- Choose Stop (the square icon).
- Launch the Automate Batch Features: Menu Bar -> File -> Automate -> Batch
- And set your own preferences.... Done.
Nothing will numb your fingers again *chuckles*


Trying this now <3 Thanks~
ReplyDeleteGood luck... you are welcome ;)
Delete